After you perform a server migration from one Exchange server to another or to Office 365, Outlook clients must be manually configured to connect to the new environment. Setting up Outlook profiles is one of the final steps in the final phase (cleanup) after migration. In this article, I will show how to reconnect Outlook profiles to the new environment in the most user-friendly way.

Why reconfigure Outlook profiles?
After a mailbox migration, it turns out that Autodiscover entries are cached in the registry before migration. As a result, Outlook cannot connect to the new environment.
Re-creating Outlook profiles is the quickest way to reconnect Outlook to the new environment. In addition, the method presented below can be used without installing third-party apps and allows to recreate profiles for the entire company at once. Below I will introduce a method to rebuild Outlook profiles and mention which profile items need to be configured manually.
How do I recreate Outlook profiles?
I have already published a detailed video guide and walkthrough on how to rebuild Outlook profiles. It shows how to recreate an Outlook profile manually as well as for the entire organization using GPO. After the migration, you can use the first, manual method in the testing phase and then use the GPO method to rebuild the profiles in bulk. There are no additional tools to install – you simply use a method that is natively available on Windows Server. MFA or other security measures do not need to be disabled.
After re-creating an Outlook profile, you will have access to all emails that have already been migrated to your target environment. Note that adding a new Outlook profile does not migrate the entire profile with all items. The same goes for Outlook configuration tools that simply rebuild Outlook profiles using the same method.
Which profile elements need to be configured manually?
There are a few profile elements that don’t have a scripted approach.
Outlook Rules
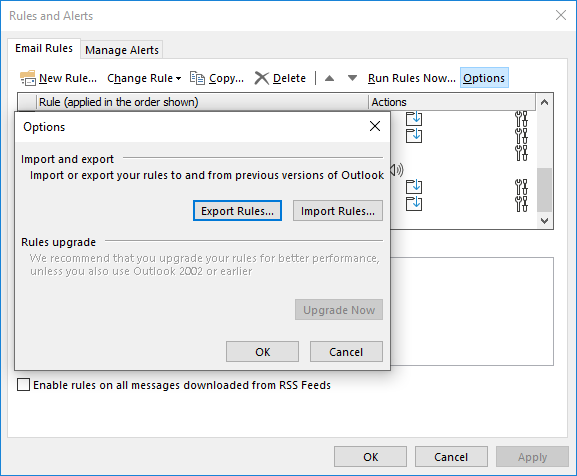
In general, Outlook rules or Inbox rules are divided into two groups: server-side and client-side. While you can easily manage server-side rules with PowerShell (Read more about inbox rules and how to manage them with PowerShell), client-side rules that are created and modified by users have to be manually exported and imported later.
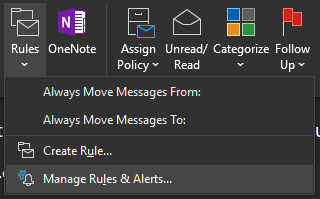
This is possible in the rule manager Export Rules or import from the files in RWZ format.
Additional Accounts
All information about additional accounts, PST or OST files are saved in Outlook profile. On the other hand, if a user has full access rights to other mailboxes, this access is retained regardless of the Outlook profile used. If automatic mapping is enabled, additional mailboxes will also appear in the Outlook client.
Outlook email signature assignments
Outlook email signatures are still available in Outlook after profile re-creation. That’s because the Location of email signature in Outlook remains the same regardless of the profile used. However, these signatures are not automatically associated with a new message or replies and forwards. Therefore, users have to assign email signatures to the respective email types themselves.
Exchange Server migration?
Thinking about migrating from Exchange Server to Office 365 or to Exchange 2019? With Exchange 2010 nearing end-of-life in 2020, if you’re using Exchange 2010 and haven’t started your migration yet, it’s high time to start planning your migration.
Finally, to make your migration experience easier and more reliable, try CodeTwo Office 365 Migration or CodeTwo Exchange Migration.