With Outlook’s Safe Senders List, you can control which emails don’t end up in the notorious Junk Email folder. On the other hand, the Blocked Senders List is a blacklist that prevents emails from reaching the inbox. Together, they’re one of the many ways we can protect you from spam and phishing while helping “good email” get to you. Read on to see exactly how it works and how you can effectively manage these lists.
How it works
The Blocked Senders and Safe Senders Lists are the manual way to control what reaches your inbox and what doesn’t. In the perfect world, you wouldn’t need to use it at all, as the auto filters should do it for you.
But let’s be honest: have you ever received a valid email from a trusted sender that ended up in junk mail? Is there an occasional SPAM or phishing message that easily reaches your inbox? I think both questions could be answered with “yes”.
This is why the Blocked Senders Lists and Safe Senders Lists can help you.
The lists are an Outlook feature, which means Outlook must first get their hands on an email for it to work its magic. In other words, if you have a server-side filtering solution (including Exchange Online Protection and its quarantine feature or email flow rules) that blocks emails before they reach your mailbox, the Safe Senders List won’t help you.
Access to blocked senders and safe senders lists
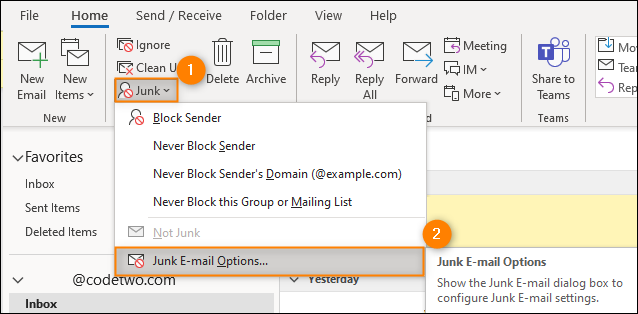
You can find both the blocked senders list and the safe senders list in the Junk E-mail Options dialog box. You can access it from the ribbon by clicking on it home > garbage > Junk E-mail Options when one of your email folders is selected:
How to add an item to the Safe Senders List in Outlook
There are two ways to manage your Safe Senders List in Outlook.
- When an email is selected, you can use home > garbage > Never block senders or Never block the sender’s domain. The former allows you to whitelist the sender of that particular message. The latter adds the sender’s entire domain to Outlook’s spam filter exceptions.
- when you go Junk E-mail Optionsyou can use the… Add to Button to add either addresses or domains to the list:

Junk E-mail Options – How to Manage Them?
How your safe and blocked senders lists work depends on the level of junk email protection you select in the options:
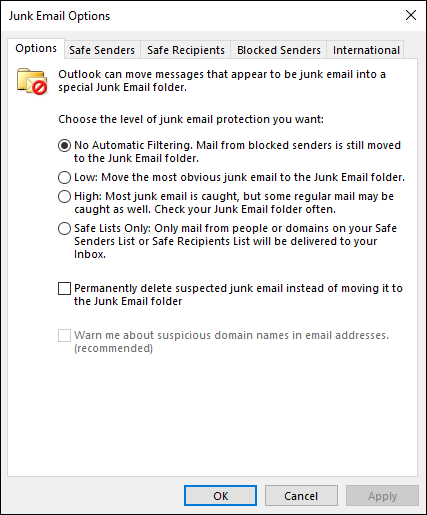
No automatic filtering allows you to get almost any email straight to your inbox. If you choose this option, only emails from addresses that are on the blocked senders list should be blocked.
Low and High Options, in addition to using your lists, block emails based on the spam score they receive, and the score depends on many factors. In general, the Low The setting should move only the most suspicious emails to the Junk Email folder while High can also intercept some normal emails. In practice, both settings intercept a number of “innocent” emails as well as junk. Learn more about the factors that cause emails to end up in spam
Safe lists only seldom used as it blocks any email that is not sent by the whitelisted recipient.
Safe Senders list limit
The safe senders list has a limit. You can’t feed it more than 1024 entries. While you wouldn’t even get close to that limit in most scenarios, it’s possible to get to it.
Let’s say you get an incredible amount of spam and phishing attempts without being able to unsubscribe. To combat it, you could use the most radical junk email attitude: Safe lists only. This gives you tight control over what goes into your inbox and what doesn’t.
However, it’s not a perfect solution. The obvious reason is that reaching out to you becomes a real pain, but it’s not the only one.
If you filter your emails in this way, your list of safe senders will sooner or later fill up. If this is the case, you cannot whitelist new addresses. The only way to deal with it is the following:
Go to your Safe Senders List. Check the Also trust emails from my contacts option and click Export to file. With it you can create a simple TXT file with your safe senders. Finally, you need to import these contacts into your Outlook contacts. To do this you can:
- Follow the steps in this article to get a sample CSV file.
- paste the addresses from the TXT file into the Email Addresses column in the CSV file;
- (optional) fill in the remaining fields, if applicable;
- Import the CSV file back into Outlook;
- Finally, remove all personal email addresses from the safe senders list.
Continue reading: