UPDATE This post was updated on April 26, 2022.
No-reply email addresses are useful in many scenarios, e.g. B. when sending notifications from transaction systems, shipping progress information, etc. Don’t expect user feedback on such messages and most of them are generated and sent automatically.
Although you can’t prevent users from sending email to a no-reply address, you can create a mailbox that blocks all incoming traffic so you don’t have to monitor it.

Before you start using a no-reply email address, you should always consider the applications and consequences of using it. With user experience in mind, you may consider adding an auto-reply to a no-reply mailbox. It’s a good idea to let your recipients know they sent their message to the wrong address and let them know how to contact you if not by replying to the email they just received.
Just a word of warning – the native autoresponder feature has limited functionality:
- Its mail loop prevention mechanism only sends one response per email address. While the mechanism itself is a must to avoid the auto-reply storm, the second time a person writes to a no-reply mailbox, most likely they forgot the auto-reply they received a week ago.
- The Reject message with explanation action creates a generic NDR with an explanation that’s easy to overlook.
- There is no way to apply branding to these messages.
If you want to bypass these limitations and be able to manage email signatures in your company, try CodeTwo Autoresponder for Microsoft 365.
If your use case doesn’t require replies at all, instead of going through the trouble of setting up a no-reply mailbox, you can use a non-existent email address as the reply-to address. Remember, no-reply mailboxes can cause you to lose valuable leads and leave your customers completely unattended. For this reason, in at least some cases, it might be better to use a mailbox that someone in your organization actually opens and reads through. At least now and then.
Create a no-reply address with a shared mailbox
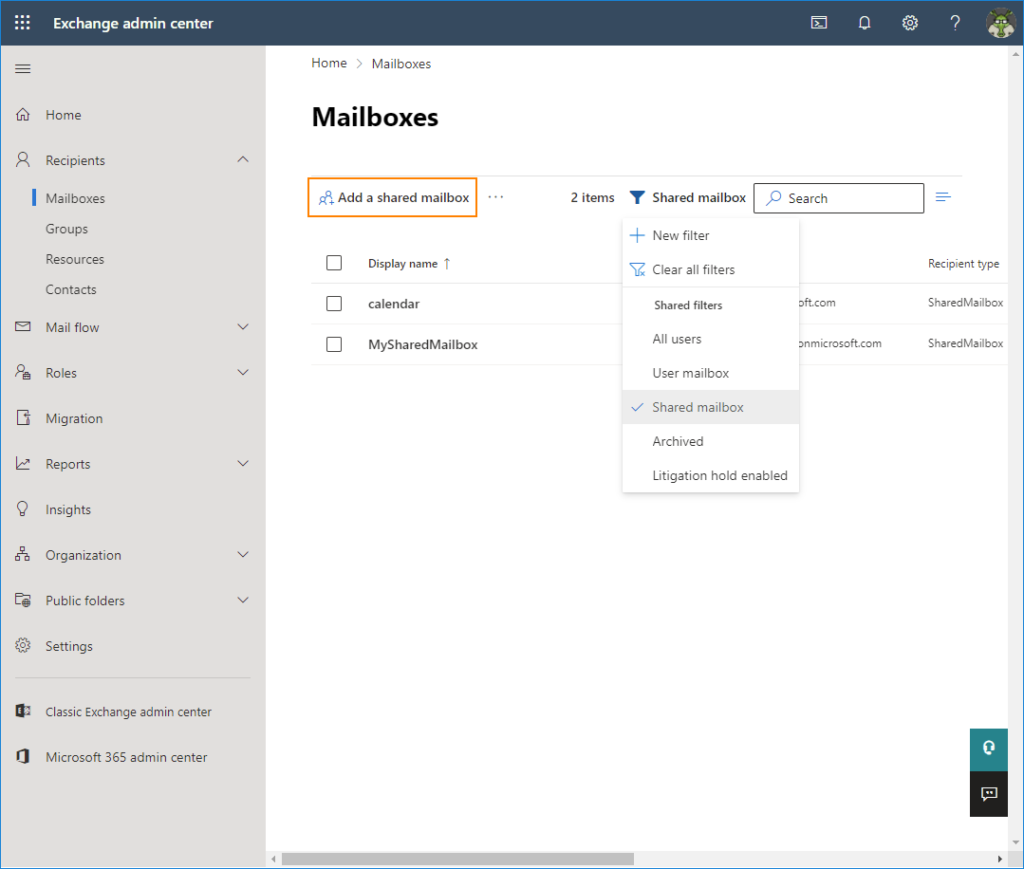
You can create a no-reply address by using a shared mailbox in Microsoft 365 because this type of mailbox doesn’t require a license. Because of its use, you probably don’t want to assign a license to a no-reply mailbox. To create a shared mailbox, open the Exchange Admin Center. Go to recipient > mailboxes and click the Add a shared mailbox Button. Optionally, you can use filters to view shared mailboxes that have already been created in your organization.
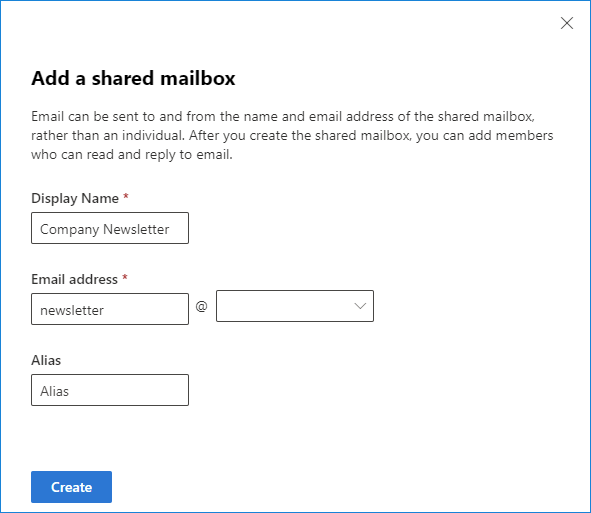
Depending on the function of the mailbox, assign an email address and a display name. Although with an address like [email protected] is incredibly popular, it can have a detrimental effect on the user experience. Such an address may indicate that you don’t want to hear from your recipients. So, it might be better to think of something friendlier [email protected] or strictly functional and appropriate to what the address is used for, e.g [email protected]. In this example, I’m using the Newsletter theme, so I’ll use that too Company newsletter Display name. You can also select the appropriate domain (in case you have more than one) and alias. When I leave this Alias Field empty, its value is identical to what I wrote in Email-address Field. click Create apply changes.
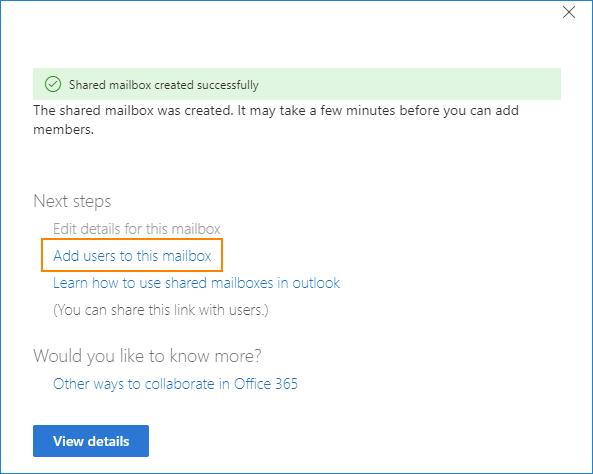
When this is done, you can use the immediately Add users to this mailbox Possibility. You can use the search field or the list of users in the window that opens to select users to become members of this mailbox (by default this user has Full Control and Send As permissions for this mailbox). This is useful when you send emails with the no reply address or when you want to set up an automatic reply with Outlook.
Once you’ve created your shared mailbox, I recommend you take one of the two approaches. You can block all emails or create a no-reply mailbox that will delete all received messages and send an automatic reply when someone writes on them.
Block all incoming emails
In the first scenario, I use the shared mailbox to create a no-reply address that doesn’t need to be monitored. You can either set it up to delete emails without telling anyone or send a non-delivery report.
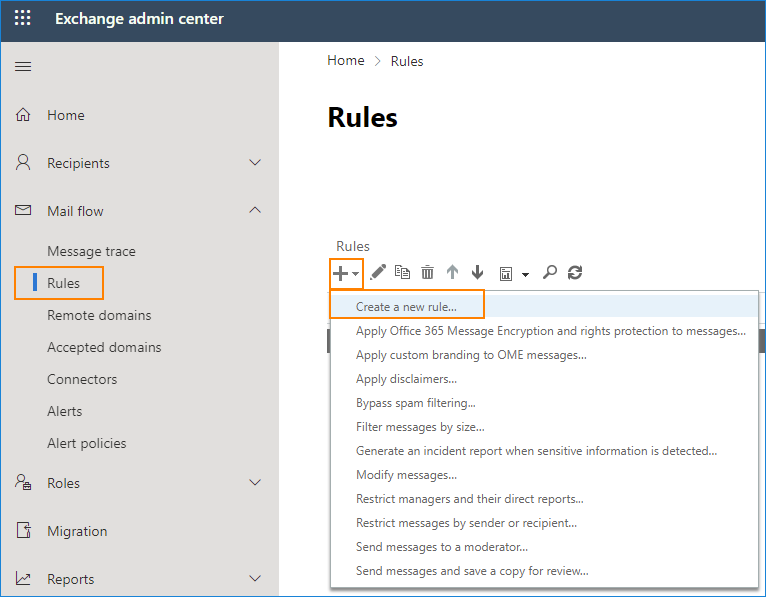
To create a rule that blocks incoming email, open the Exchange Admin Center. Go to mail flow > Rules. click Add to and select Create a new rule from the drop-down list.
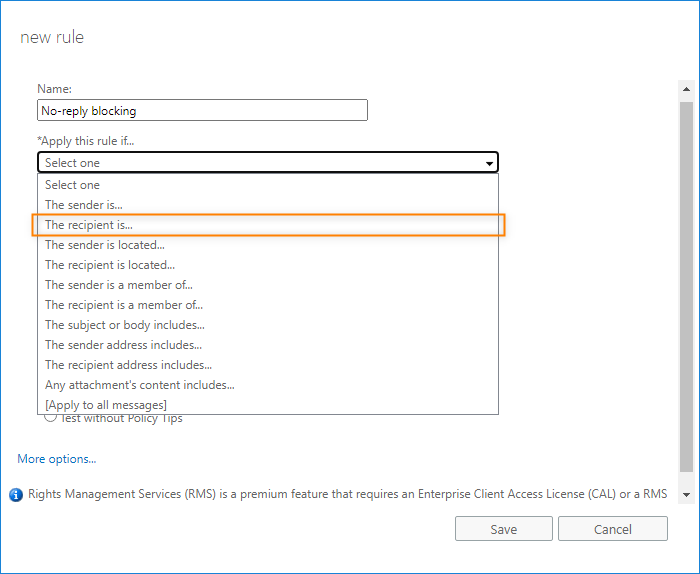
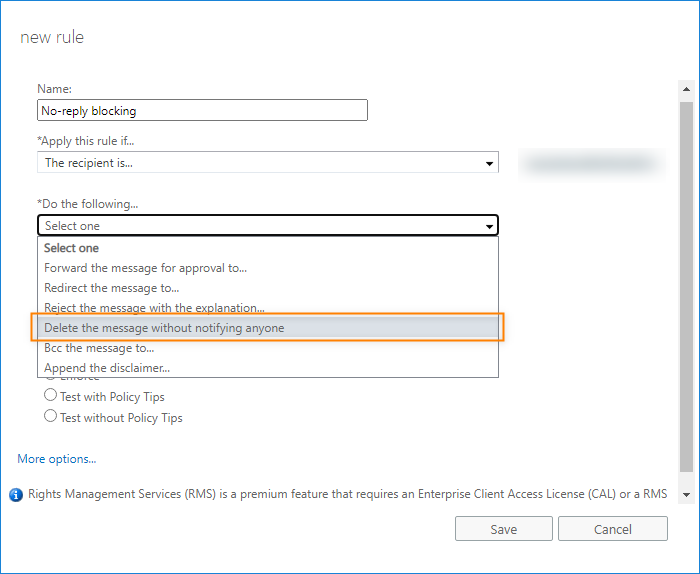
Name the new rule, e.g No Response Blocking. In which Apply this rule if select list The recipient is.
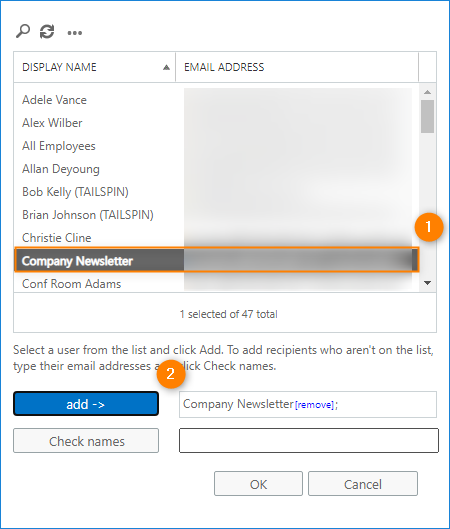
In the window that opens, select the previously created shared mailbox from the list (in my case this is Company newsletter – [email protected]). click Add and confirm with a click OK.
If you want to delete incoming e-mails without leaving a trace, you can use the Do the following list, select Delete this message without notifying anyone.
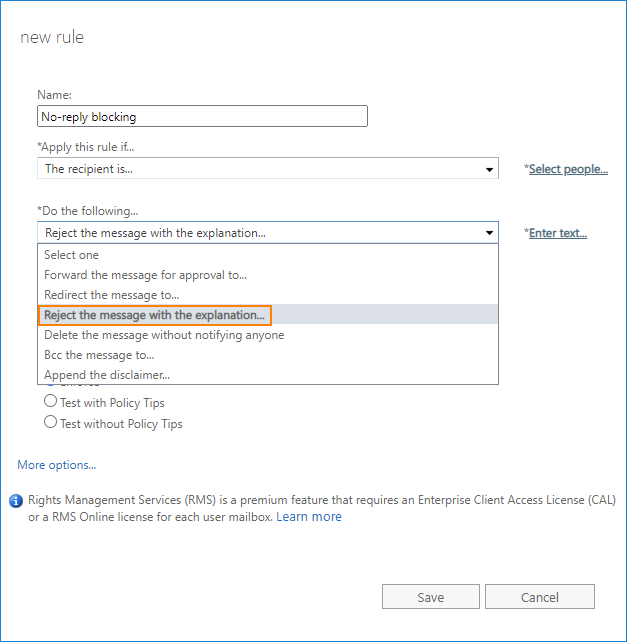
If you want to inform the sender that their email never reached you, use the Reject the message with the explanation Possibility. You can add a short note, for example: This is a no-reply mailbox. Go to www.example.com/contact to see how to contact us. Finally click Save on computer to create the mail flow rule.
When this is done, any email will be sent to [email protected] are deleted before they reach the inbox. As a result, you do not have to assign an employee to monitor this address. If someone decides to email that address anyway, they’ll (of course) never get a reply from you, but they might get an NDR, depending on the option you chose.
Although you can add an explanation to the NDR, many users won’t see it. NDRs aren’t designed for end-user convenience – the message, which you can customize, isn’t highly visible or appealing. If you want to remedy this, you can go another way.
Set up a no-reply address with auto-reply
Instead of immediately deleting all incoming emails as in the example above, in the second scenario I configure a retention policy that removes all emails from the inbox of your no-reply mailbox after a certain period of time, which can be as short as 1 day . If you wish, you can set up a longer email retention period so that you (or another employee) have the opportunity to review the incoming email. Also, let’s set up an auto-reply notifying any potential sender that this mailbox is not regularly monitored.
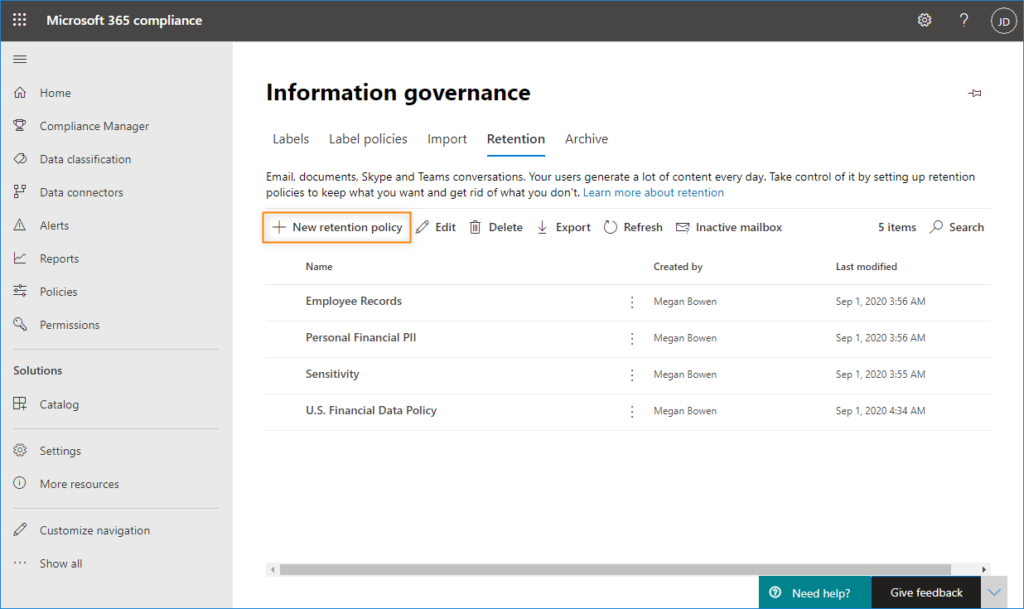
Start by opening the Microsoft 365 Compliance Center. Go to guidelines > retention and click New retention policy.
In which Surname Page select how you want your retention policy to be accessed, e.g No-Reply Mailboxes. Confirm by clicking Next. In which Locations page, select exchange email. Then click To edit in which Included Pillar.
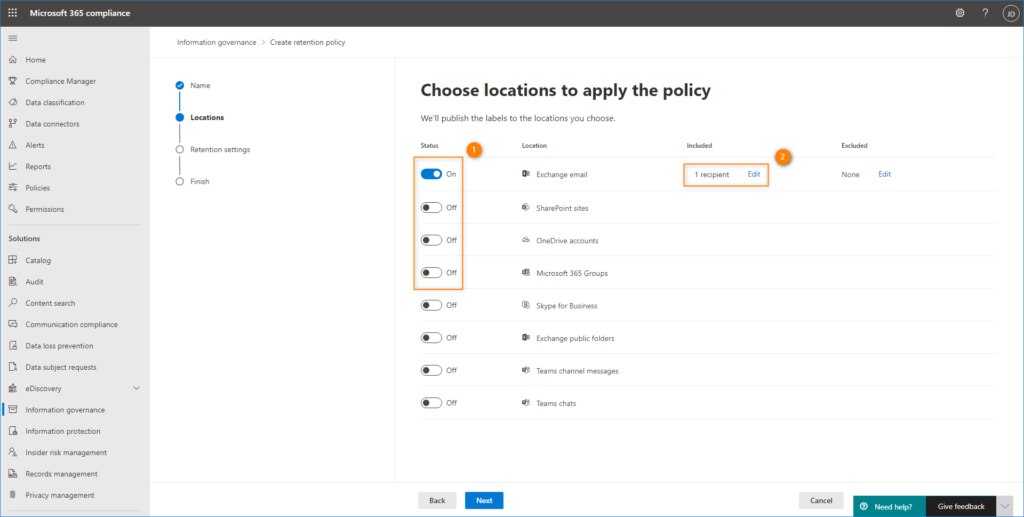
Use the search box or mailbox list to find and select your no-reply mailbox. Confirm by clicking Done.
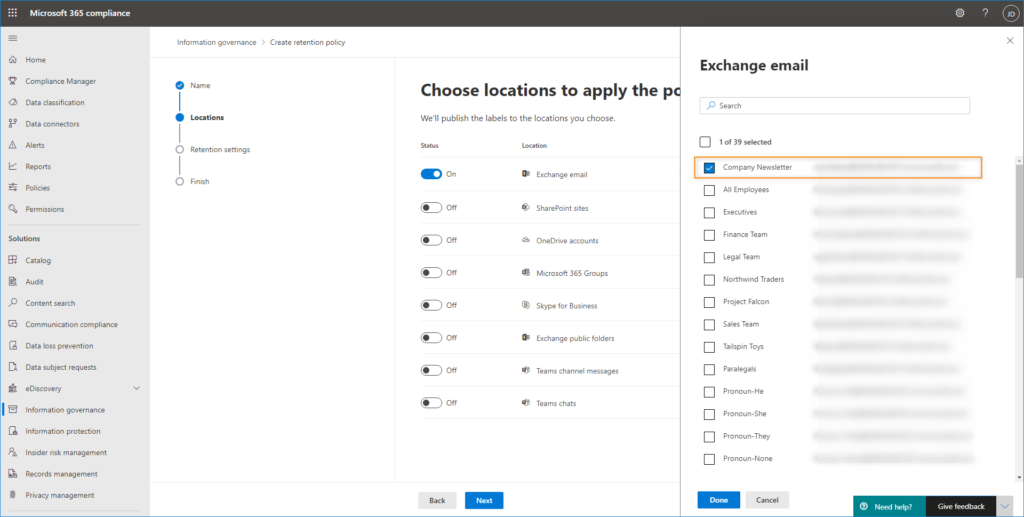
click Next to go retention settings. Choose Only delete articles when they have reached a certain age. In which Delete items older than Select drop down list Custom and use the fields provided to delete items older than 1 day. Then in Delete content based on Select drop down menu When articles were created.
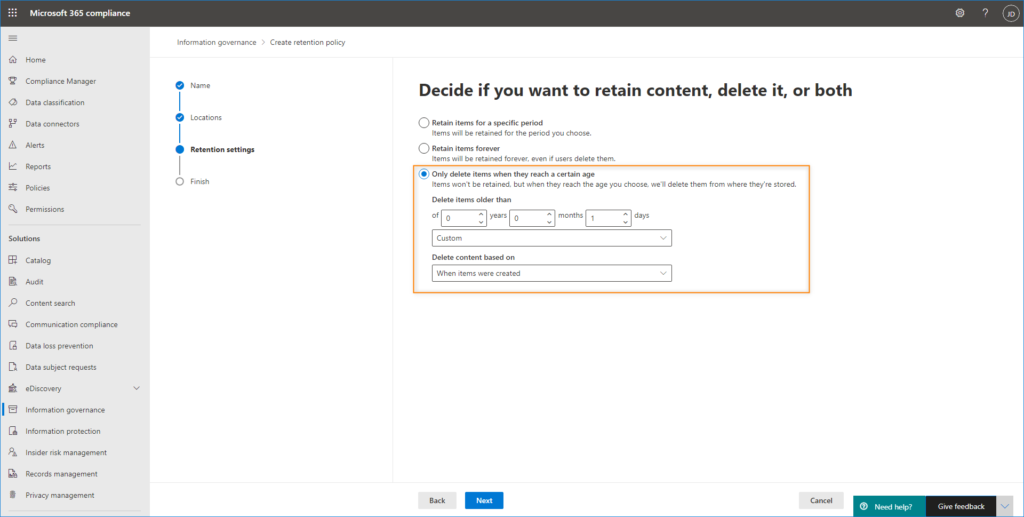
When you click Next, you get to the overview page. click Submit to create the new policy. Note that it may take some time for it to take effect.
Configure an automatic reply
With the retention policy, I can now set up an auto-reply for the no-reply mailbox. There are a number of methods to do this, but in general the setup is identical to creating an out of office message. This article explains in detail how to set up automatic replies in Microsoft 365 using the admin center or PowerShell. Below is a quick guide to using the Microsoft 365 admin center.
open that Microsoft 365 admin center and go to groups > Shared mailboxes. Then select your no reply mailbox by clicking on it. In the newly opened pane, click To edit in which Automatic replies Section.

In which Manage automatic replies area select the Send automatic replies to senders within this organization and Send automatic replies to senders outside of this organization check box. Also choose the Send replies to all external senders radio button. Enter your auto-reply text in the spaces provided and click Save on computer to confirm.
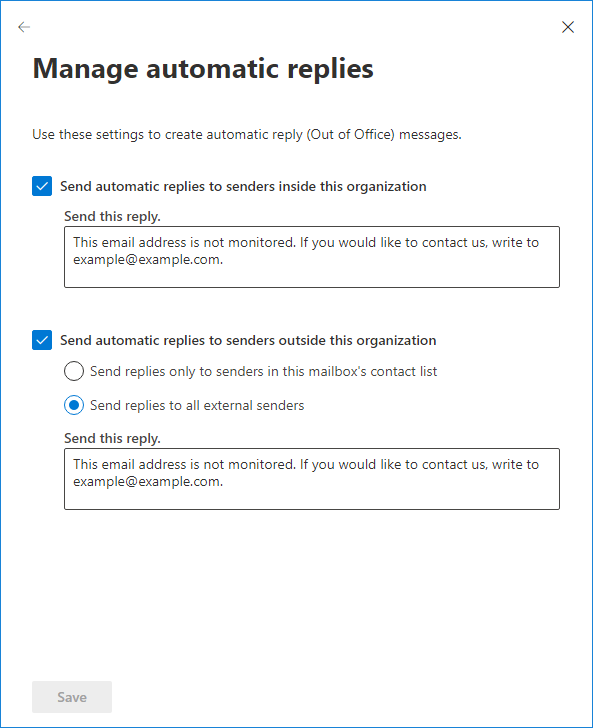
Again, keep user experience in mind when creating an auto reply. In most cases, a short answer like This email address is not monitored. If you want to contact us, please write to [email protected] should work.
However, depending on the context of the message the user is trying to reply to, you may also want to provide some additional information such as
Continue reading