[Update]: This blog post was updated on March 6, 2020.
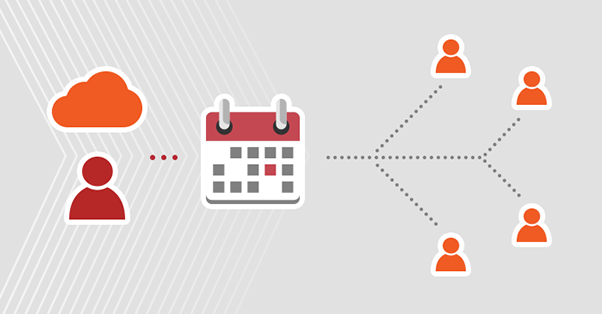
Would you like to improve collaboration in your organization? Calendar Sharing can help you with that. You can share a calendar in Office 365 by following at least three methods. The first method is sharing a calendar in Outlook on the web (OWA), the second is sharing a calendar in Outlook, and the third method is creating a shared mailbox with access to the shared calendar. This blog post provides guides for all of these methods.

Share an Office 365 calendar in Outlook on the web
To share a calendar in Outlook on the web (OWA), you must:
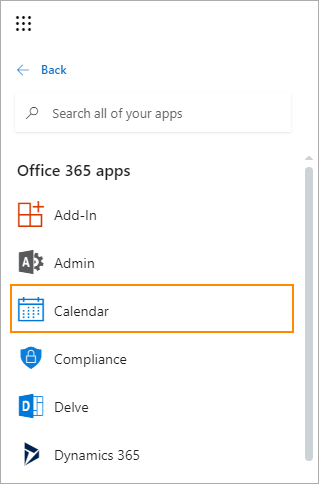
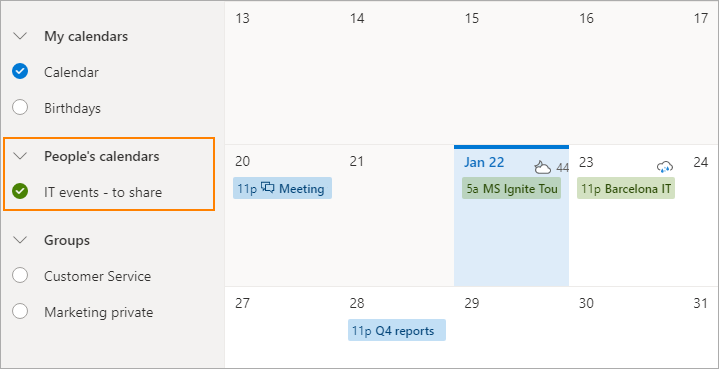
- Open a calendar that you want to share with other users in your Office 365 organization. You can access it from the main menu in Outlook on the web (you may need to click All apps to see calendar Possibility):
or by clicking the calendar icon at the bottom of the left pane: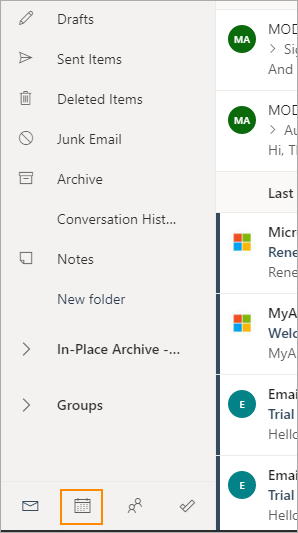
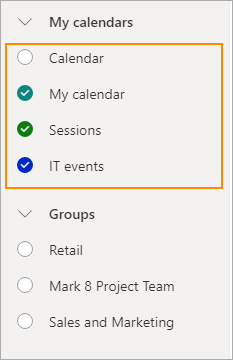
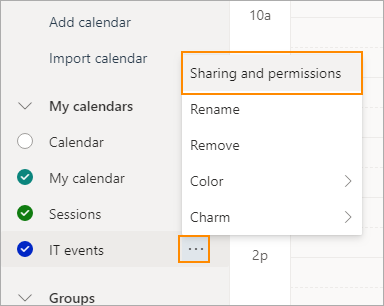
- Of the my calendars List, select a calendar to share.
- When you hover over the selected calendar, three dots appear next to its name. Click on the dots and then Sharing and Permissions.
- Now you can choose people you want to share the calendar with. You have to add them one by one.
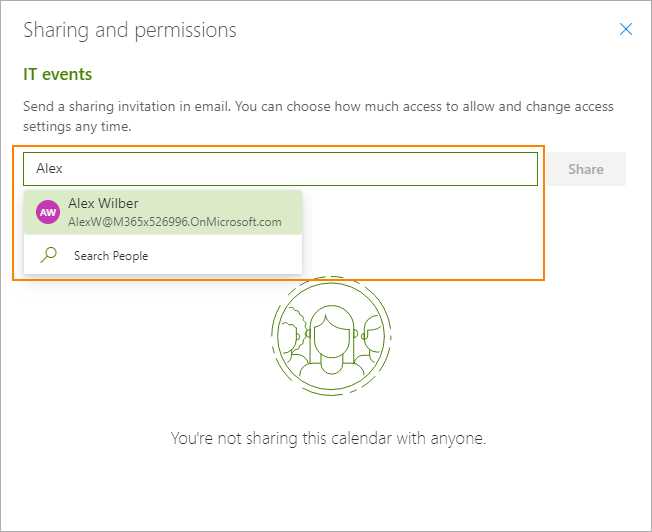
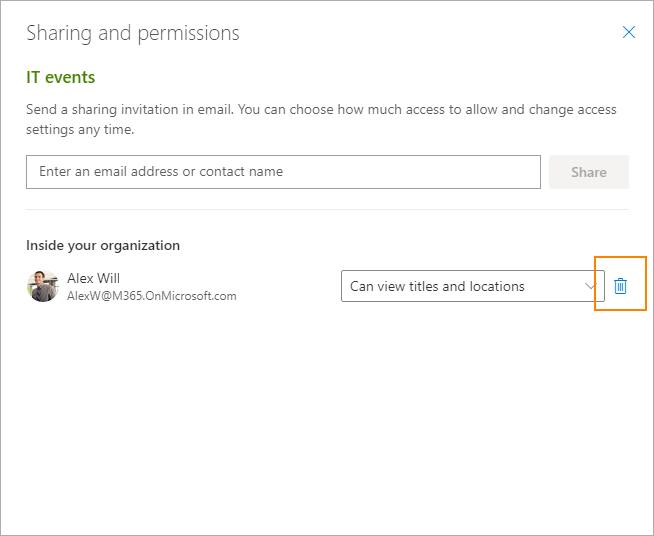
- You can set up access rights for each person separately. This way you decide what people can do with your shared calendar. To confirm the setup and start sharing the calendar, click Split.
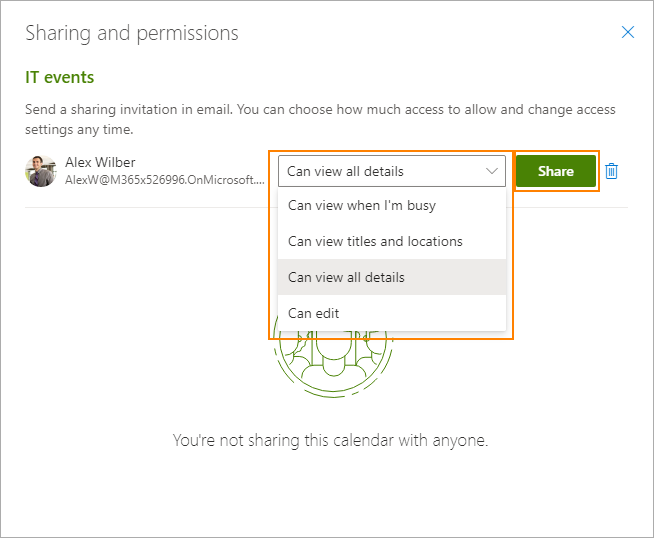
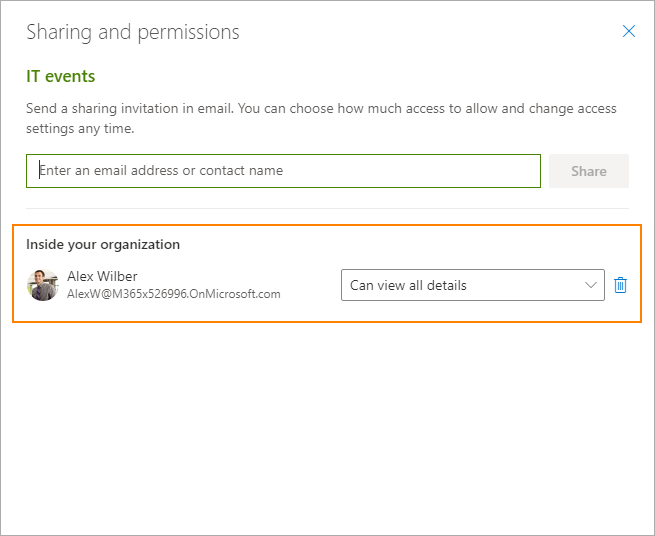
- The selected person will appear in the list below. At any time you can change the access rights for a selected person or remove them from the sharing list by clicking on the trash can icon.
- Once you click the Split button, the person you specify will receive an email where they can accept your calendar sharing invitation by clicking the button Add this calendar Button.

- After that, the email recipient can view the shared calendar by clicking view calendar Button.

- If you go calendar view, the shared calendar should appear there along with your other calendars.
Share an Office 365 calendar in Outlook 2019 and 2016
Follow the steps below to share your calendar in Outlook 2019 or 2016:
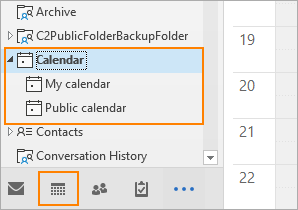
- First open Outlook and then select a calendar you want to share from the left pane or click the calendar icon from the bottom menu.
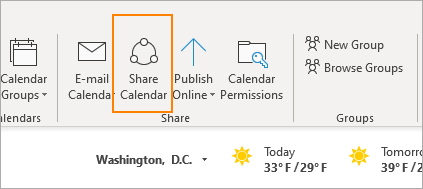
- In the calendar view, switch to home menu and under the Split group, click share calendar.
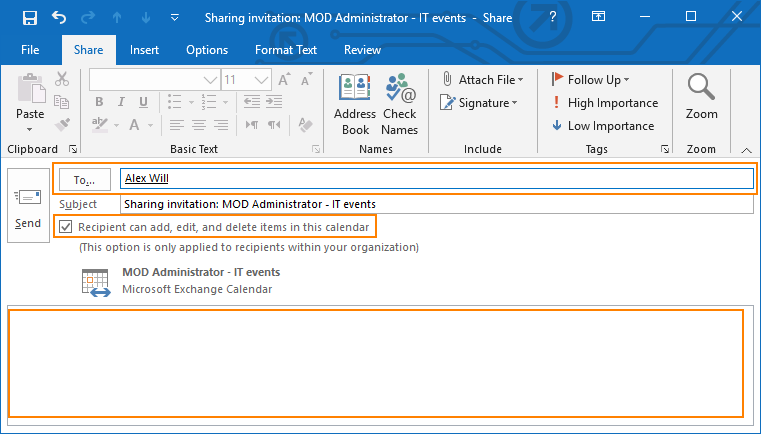
- In which share invitation In the window, select the users you want to share the calendar with. If you want users to be able to Add, to edit and Clear items on your calendar, make sure you select this option as well. In the section below you can enter some comments if needed. click Send once the invitation is ready.
Create a shared calendar in Office 365
To create a shared calendar in Office 365, you need to create a shared mailbox and assign full control permissions to users who use its calendar. The calendar that comes with that shared mailbox becomes the shared calendar for the selected users.
Follow these steps to create a shared calendar in Office 365:
Create a shared mailbox in Office 365
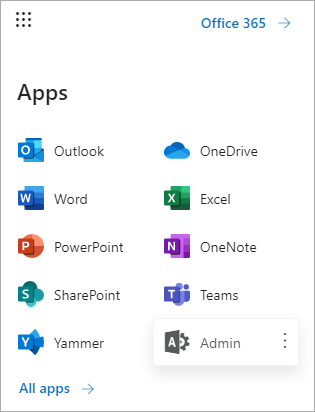
- Sign in to your Office 365 portal with your admin credentials and click the Administrator access app Microsoft 365 admin center.
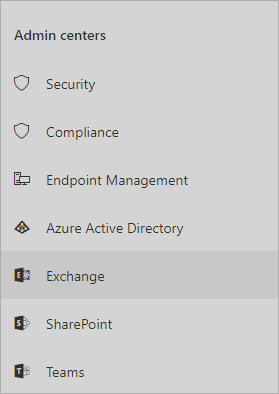
- In the Microsoft 365 admin center under the administrative centers section, select Exchange.
- In which Exchange Admin Centergo to recipientand divided.
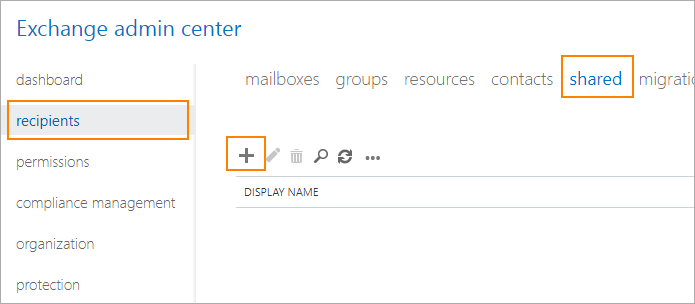
- press the plus (+) icon to add a new shared mailbox.
- Provide the name for your shared mailbox, enter an email address, and add users who are authorized to use this shared mailbox.
noteNote: Instead of adding individual users individually, you can create a security group first and then add that security group to the shared mailbox. This is useful when you need to manage permissions for many users in the organization.
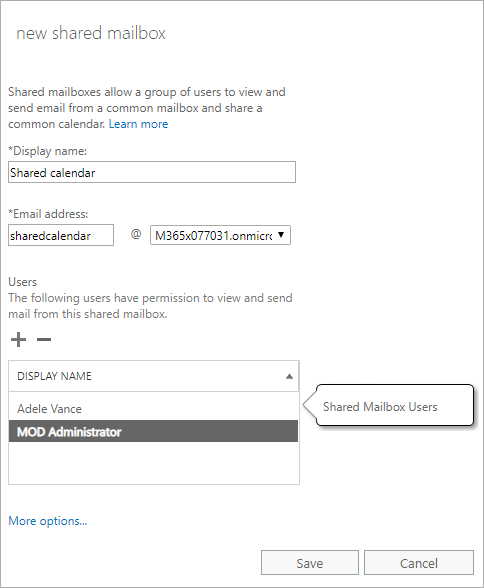
- click Save on computer to create the shared mailbox.
- The new shared mailbox should appear on the divided list. Double-click it to edit its settings.
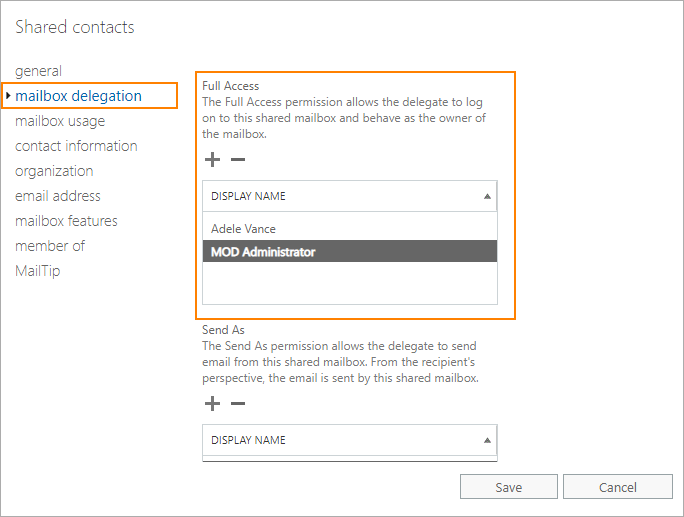
- In which mailbox delegation Make sure the selected users (or a security group) have a tab Full access Permissions assigned to this mailbox. click Save on computer to finish creating the mailbox.
Note: Full control permissions allow users to add, edit, and delete calendar entries in the shared calendar. Users who don’t have permissions for this shared mailbox can only see the free/busy status.
Using the shared calendar in Outlook
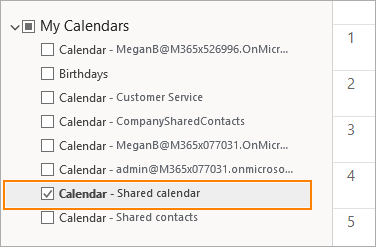
When you finish creating the shared mailbox, you can use its calendar as a shared calendar. Check if you can see it in your Outlook. It should automatically appear below my calendars.
Using the shared calendar in OWA
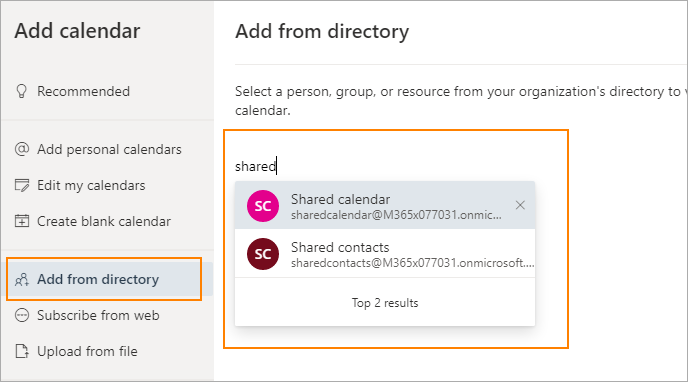
View and use the shared calendar in Outlook on the web (OWA) you need to open it from a directory. To do that:
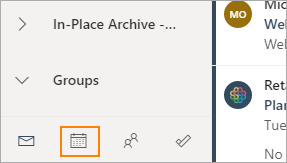
- Switch to the calendar view. It can be accessed from the bottom menu in the left pane in Outlook on the web by clicking calendar Symbol.
- click Add calendar.
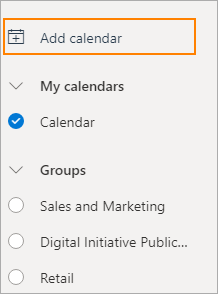
- Choose Add from directory and search for your shared calendar by typing the shared mailbox name.
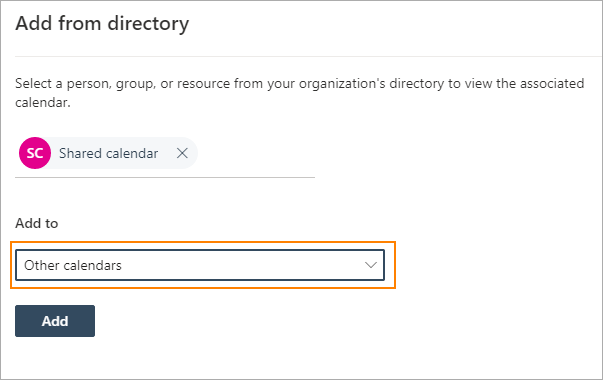
- In which Add to In the section, select where to add the calendar and click Add to.
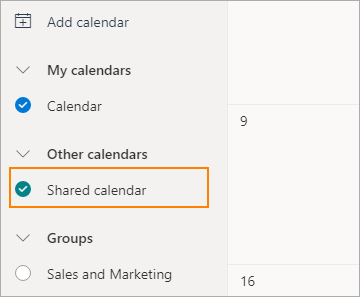
- The shared calendar should appear in the calendar list.
Note: The test environment I used for this guide is the Microsoft 365 E5 suite. In other plans, the steps and screenshots may look slightly different.
How do I stop sharing calendars in Office 365?
If you no longer want to share your calendar, you can either remove the calendar from sharing (Outlook on the web) or remove calendar permissions (Outlook 2019 and 2016).
To stop sharing your calendar in Outlook on the web:
- Go to step 6 out the instruction above.
- Click the trash can icon to remove the users from the sharing list.
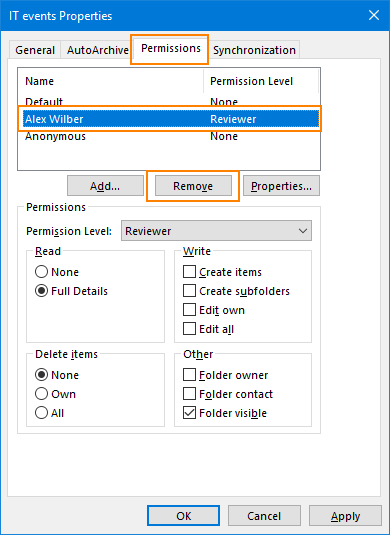
Stop sharing your calendar in Outlook 2019 or 2016
To stop sharing your Office 365 calendar in Outlook 2019 or 2016, follow these steps:
- In the calendar view, go to home menu and under the Split group, click calendar permissions.
- In which calendar permissions window, go to Permissions and select users you want to remove from the share. click Removethen Applyand OK.
That’s it. With these two simple methods, you can share a calendar in Office 365 using the native options built into Outlook on the web and Outlook 2019/2016.
See also: