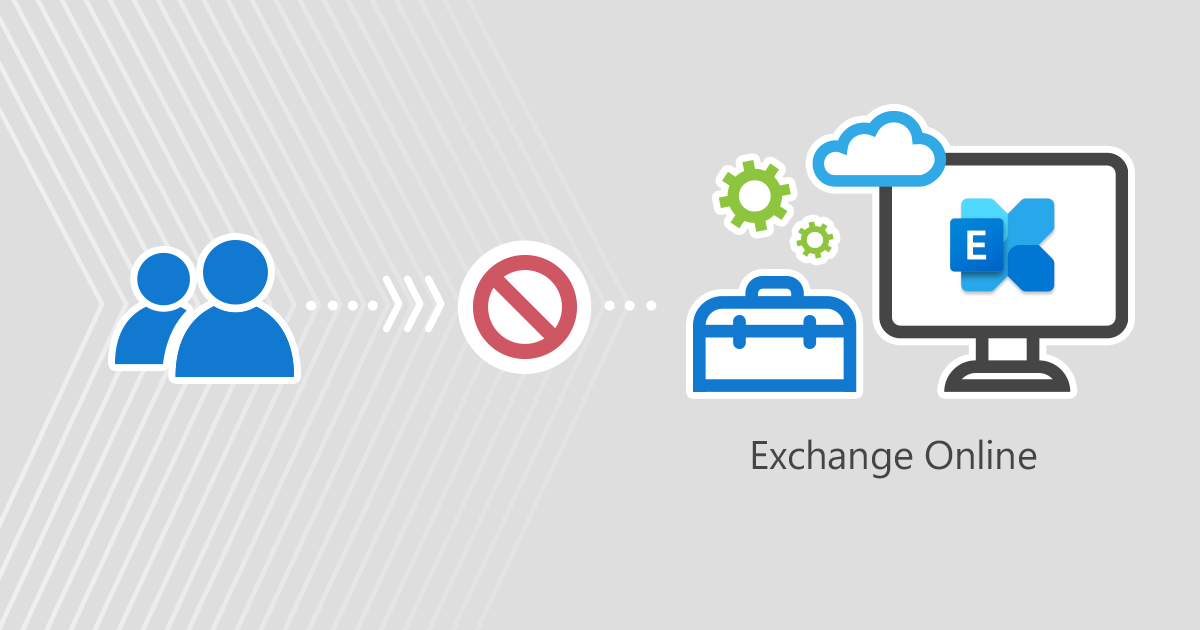
Client access rules in Exchange Online are rules that you can use to control which client connections are allowed and not allowed to access your Exchange Online organization. They allow you to define the conditions based on various properties of a client. For example, this could be the protocol they use to connect, their IP address, or an Active Directory attribute. This gives you the ability to block (or allow) specific client connections to better protect your Office 365 organization.

The elements of the client access rules
Client access rules are defined with the following attributes:
- conditions – Here you define the client connections for which you want to block or allow access. Once the conditions are met (the client trying to connect to your EO matches the characteristics in the conditions), the action will be applied.
- exceptions – This attribute allows you to narrow the scope of the rule, which means that the rule will not be applied to this client connection if the client connection matches your exceptions. It’s optional.
- Actions – Here you decide whether you want to allow or block access to your Exchange Online organization.
- priority – Each rule is assigned a priority number. The lower the number, the higher the priority. By default, the oldest rules have the highest priority, so they are processed first.
note: Once a rule has been applied, no further rules are processed.
The Client Access Rules cmdlets
You can use the following cmdlets when managing client access rules:
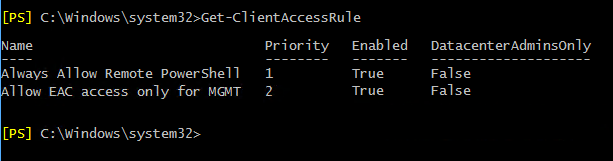
- Get-ClientAccessRule – shows a list of currently configured rules.
- Set-ClientAccessRule – changes existing rules.
- New-ClientAccessRule – creates new rules.
- Test-ClientAccessRule – lets you test the configuration of the rule.
- Remove-ClientAccessRule – removes the rules.
For more information about using Client Access Rules cmdlets, see this Microsoft article.
Note: To manage client access rules, we recommend using the Exchange Online PowerShell V2 module, which supports modern authentication. This article shows how to use the V2 module to start a remote session with Exchange Online. Note, however, that you still need to configure the Basic authentication setting in WinRM even if you use the V2 module (more info on this Microsoft website).
With client access rules, you can cover so many different scenarios that it’s impossible to discuss them all. For that reason, I’ll focus on a few examples that might be a good place to start your exploration of client access rules.
Block access to the Exchange admin center in Office 365 (Microsoft 365)
You can use client access rules to prevent external or internal client connections to your Exchange admin center. This helps you to protect your company from unauthorized access attempts.
Important: Before you begin, it’s a good idea to run the following cmdlet, which prevents remote PowerShell from being accidentally blocked for the admin. You definitely don’t want to lose access yourself. The rule should have the highest priority.
New-ClientAccessRule -Name "Always Allow Remote PowerShell" -Action Allow -AnyOfProtocols RemotePowerShell -Priority 1

Block access for all users except a specific IP address
Run the following cmdlet to block access to the Exchange admin center for all users except an IP address (e.g. Management):
New-ClientAccessRule -Name "Allow EAC access only for MGMT" -Action DenyAccess -AnyOfProtocols ExchangeAdminCenter -ExceptAnyOfClientIPAddressesOrRanges 192.168.171.0 -Priority 2
Note: You can also specify an IP address range, e.g. B. 192.168.171.0-192.168.171.254 or 192.168.171.0/24.
Get a list of client access rules
Run the following cmdlet to see which rules you have already configured:
Get-ClientAccessRule
Verify that the rule works as expected
To test your client access rule, you can use the following cmdlet:
Test-ClientAccessRule
For example:
Test-ClientAccessRule -AuthenticationType BasicAuthentication -Protocol ExchangeAdminCenter -RemoteAddress 192.168.171.0 -RemotePort 443 -User [email protected]
Remove PS session
After setting up your client access rules, make sure to disconnect the session using this cmdlet:
Disconnect-ExchangeOnline
If you’re not using the Exchange Online PowerShell V2 module, disconnect using the following cmdlets:
Get-PSSession | Remove-PSSession
Prevent access to EAC based on Active Directory user attributes
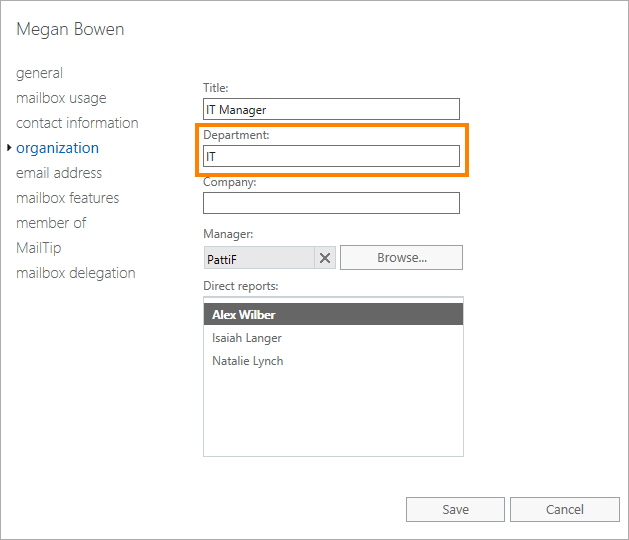
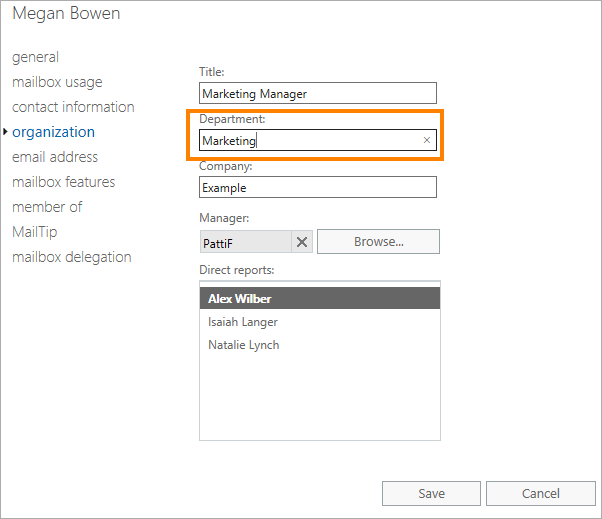
Depending on a user’s Active Directory attributes, you can define who can or cannot access the Exchange admin center. This is useful, for example, when you cannot rely on IP addresses (users’ different locations and networks). Then, to create a client access rule for a specific group of people, you can use one of the AD attributes, such as the Department attribute.
Remove old rules
To start creating this new rule, I’ll first remove the IP address rule I added in the previous steps. The cmdlet to remove is as follows:
Remove-ClientAccessRule –Identity "Allow EAC access only for MGMT"
Create a new rule
To now allow access to EAC only for members of the IT department, you can use the following cmdlet:
New-ClientAccessRule -Name "Allow access to EAC only for IT" -Action DenyAccess -AnyOfProtocols ExchangeAdminCenter -UserRecipientFilter {Department -ne 'IT'} -Priority 2
This verifies that the value of the department attribute matches “IT”. All access attempts with different department values are blocked. For example, all members of the marketing or sales department don’t have access to the Exchange admin center.
Verify that the rule is working correctly
After you create the rule, it’s a good idea to verify that it’s working as expected. To verify this, try connecting to the Exchange admin center from a user account where the department value is equal to “IT”. Then repeat the test, but this time change the department value for the user to something like “HR” or “Marketing” and see if access is blocked for that user.
You can also run the Test-ClientAccessRule cmdlet to test this. For example:
Test-ClientAccessRule -AuthenticationType BasicAuthentication -Protocol ExchangeAdminCenter -RemoteAddress 192.168.171.0 -RemotePort 443 -User [email protected]
bottom line
As mentioned, these are just examples of what you can do with client access rules to manage client connections to your Office 365 organization. Explore the topic and strengthen your corporate security.
See also: