Email encryption provides an additional layer of information security by ensuring only intended recipients can read messages. If you’re looking for an easy-to-use email encryption solution for your Microsoft 365 organization, there’s a native tool for that – Office 365 Message Encryption. It is the easiest to use from the user’s point of view: it can be configured in such a way that it does not require any additional actions on his part. From the recipient’s perspective, this form of email encryption works seamlessly with Microsoft 365 accounts and provides an intuitive experience for all other email clients and email service providers. Read on to learn how to create a Microsoft 365 sensitivity label and use it in a transport rule to encrypt email and files.

How encryption works in Microsoft 365
Office 365 Message Encryption is a service built into Microsoft email clients (Outlook Desktop, Outlook for Mac, Outlook Mobile on iOS and Android, and Outlook on the web). It has a number of features and configuration options, but here I’ll focus on how to automatically encrypt emails sent by members of a specific group (the legal department) outside of your organization.
In this scenario, a message is encrypted as it’s sent (before it leaves your Microsoft 365 organization) and the sender doesn’t have to do anything. When the encrypted message reaches the intended recipient, they are prompted for authentication to open the message content. If the recipient is signed in to their Microsoft 365 or on-premises Exchange account and is using one of Microsoft’s email clients, you don’t need to take any further action. The message will open as usual, but will contain information that it has been encrypted (the same applies to email attachments). If the recipient uses one of the other supported email clients such as Gmail, Yahoo! or Outlook.com, they receive a wrapper email that directs them to the Office 365 Message Encryption Portal (OME Portal) where they are prompted for authentication. The authentication method required depends on the email client and may require you to follow a link to resend the user’s credentials, or enter a one-time code that can be sent to the recipient in a separate message. With some email clients, opening an encrypted message may require manually entering Microsoft account credentials or using a one-time code to open the message in the OME portal.
This article will show you how an admin can use Office 365 Message Encryption to encrypt email without user interaction. There is also a mechanism that allows a user to encrypt emails when composing them in Outlook desktop app or Outlook on the web. Read this Microsoft article to learn more.
requirements
Office 365 encryption is based on Azure Rights Management Service (Azure RMS) – part of Azure Information Protection – so you need a Microsoft 365/Office 365 plan that supports it (as of May 2021 it is the Enterprise E3 plan or higher). or you must purchase Azure Information Protection Plan 1 separately for users who use email encryption in your organization. Be sure to check the current Microsoft requirements here.
Before you start using Office 365 Message Encryption, verify that the Azure Rights Management service is active in your organization, as described in this Microsoft article.
Labels and policies required to configure Office 365 Message Encryption were previously maintained in the Azure portal, but this solution reached end of life on April 1, 2021. Sensitivity labels are now managed in the Microsoft 365 compliance center, but you may need to deploy the unified labeling client across your organization, as described in this Microsoft article.
configuration
Setting up Office 365 encryption to encrypt email sent externally is relatively easy. You will do this in two steps. First, configure a sensitivity label to apply encryption. Then create a transport rule that applies that label to outbound messages sent by members of a selected user group.
Configure a sensitivity label
For the purposes of this article, I’m going to create a new sensitivity label that encrypts email and files attached to it. You can skip this section if your organization already has sensitivity labels and policies in place, or if you want to use a default label created by Microsoft.
To create a new label:
- Go to Microsoft 365 Compliance Center and open information protection > labels from the menu on the left (expand the menu by pressing show everything if you don’t see the links).
- open that labels Tab and click Create a label. This opens the New sensitivity label Magician.
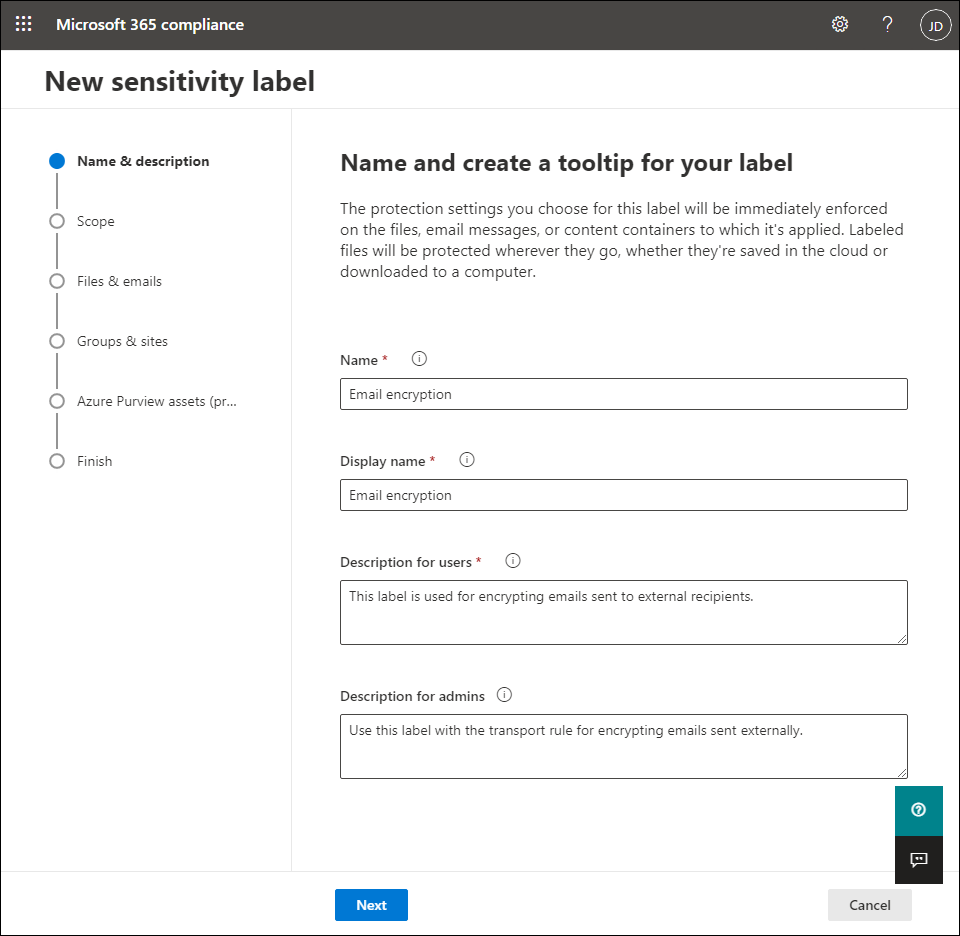
- Use the fields provided in the Name & Description Step to enter the label name and additional information. The information in the display name and Description for users Fields are visible to email recipients, so make the description clear and concise. click Next to go to the next step.
- In which scope Select wizard step Files & Emails and confirm with a click Next.
- In which Files & Emails step, select Encrypt files and emails and leave them Mark the content of files not selected.
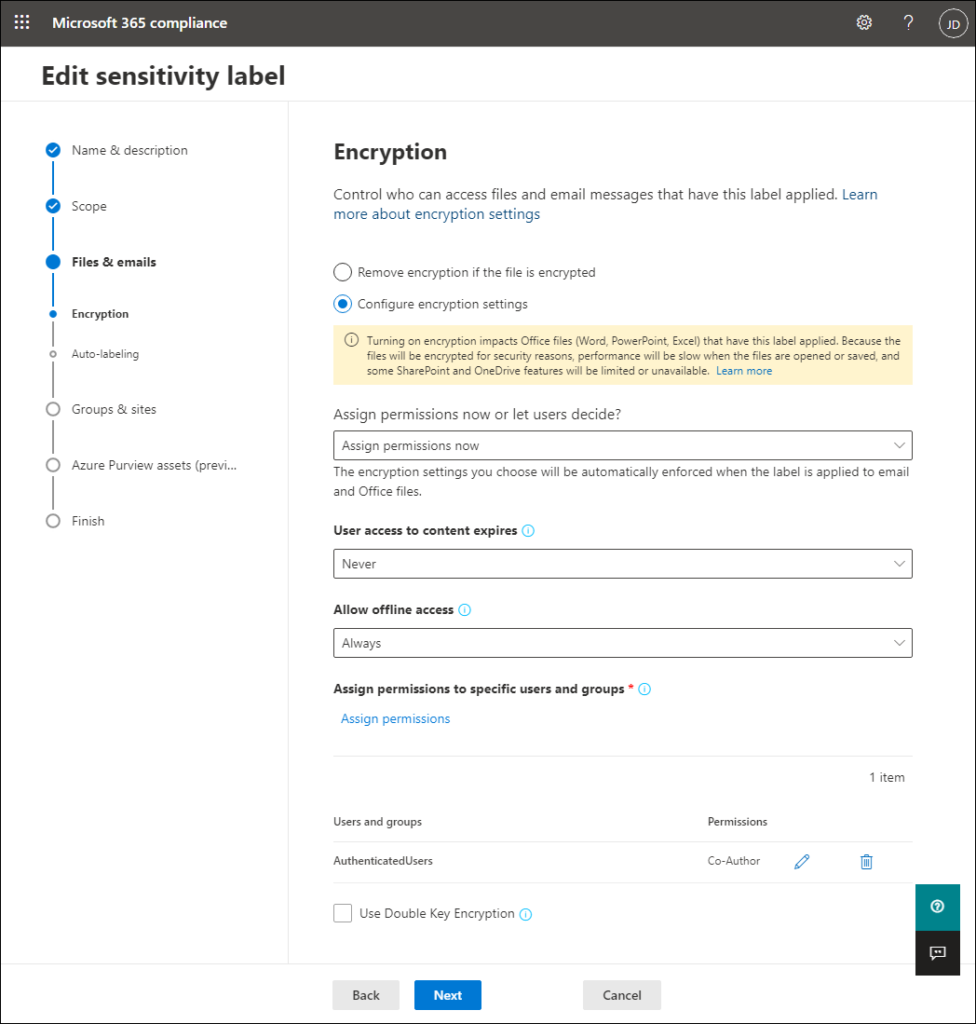
- In which encryption step, select Configure encryption settings. Choose Assign permissions nowand then select Never in which User access to content expires and Always in which Allow offline access Drop-down menus as shown on the screen below.
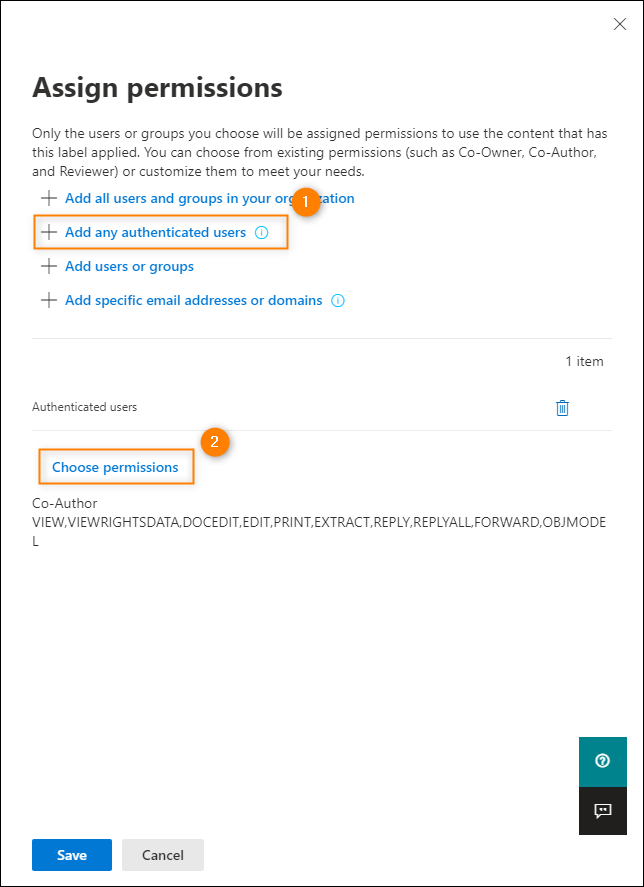
- press the Assign Permissions link (the blue link visible in the screen above) and click in the window that opens Add all authenticated users (see screen below). The permissions set in this step control who can open the email and its attachments. The setting I selected allows users outside your organization to access and open messages and their attachments if they’re authenticated.
- In the same area, click Select Permissions (see screen below) and select a permission level. The permission level controls what the user can do with the email and its attachments. In this example I set the co-author Permission level that does not impose many restrictions. click Save on computer to confirm and close the window.
- In the next step Automatic labeling, you can set up Microsoft 365 to apply this label if it determines that the email or file contains certain types of information, such as an account number, passport number, or other private information. In this example this is not necessary as I want the transport rule to control when this label is applied, so turn this feature on out of with the switch.
- Because I chose to only use this label with emails and files, I can’t change any information in Groups & Sites and Azure Purview resources (preview) Steps.
- In which End Step you can review the label configuration and make changes if necessary. When you’re done, click create label Button.
Creating a label may take a few seconds and you will receive a notification when it is complete. click Done to confirm and close the wizard. Note that it can take up to 24 hours for the new label to propagatetherefore, you may have to wait before you can perform the steps described later in this article.
Configure a transport rule to apply encryption to emails sent externally
When the label is ready I will use it to create a transport rule that will automatically apply encryption to emails sent from members of a selected group outside the organization. You have various options for specifying the scope of senders whose e-mails are encrypted. It is important to remember to define any conditions and exceptions in the transport regulation as it will control whether the label will be applied. To:
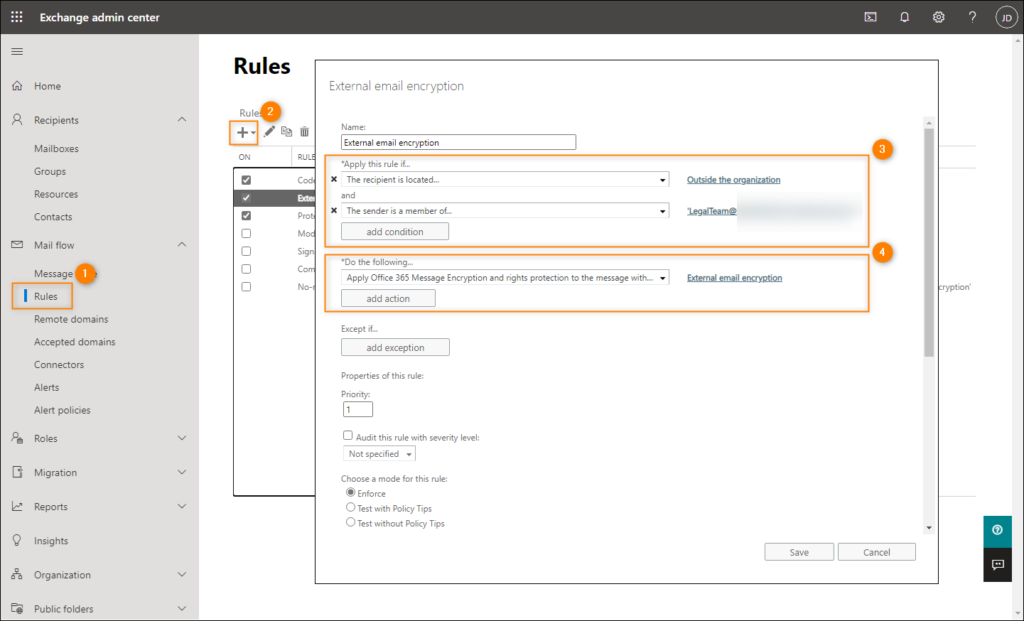
- open that Exchange Admin Center and go to mail flow > Rules.
- press the New press and select Apply Office 365 message encryption and rights protection to messages.
- Name the new rule, e.g External email encryption.
- In which Apply this rule if Select drop down menu The recipient > Is internal/external and select Outside the organization. Confirm by clicking OK.
- click add condition and select The sender > is a member of this group from the drop down menu. In the window that opens, select the group whose members should encrypt their emails (in this example, Legal Team), click Add and confirm with a click OK.
- In which Do the following menu make sure Apply Office 365 message encryption and rights protection to messages is selected. Then click the choose one link on the right and select the sensitivity label you created in the previous steps (or the default label or any other existing label of your choice). In this case I chose External email encryption.
- click Save on computer to create the new transport rule.
Once the new rule is created, any email sent from a member of the selected group (Legal Team) to a recipient outside the organization will be automatically encrypted using Office 365 Message Encryption.