Microsoft 365 Security Groups, formerly known as Office 365 Security Groups, allow administrators to access e.g. B. Manage SharePoint sites easily by grouping users who need identical permissions. That way, you only have to assign access once for the entire group, not for each user individually. In this article, we will show you how to create, add and remove members of a security group using the Microsoft/Office 365 admin center and how to streamline the process using PowerShell cmdlets.
Fast navigation
How security groups work
How security groups work in Microsoft 365 is fairly simple. First, create a security group and add members to that group. This group can then be used, for example, to grant only these members access to a specific page in SharePoint. Each of the users within the security group has equal permissions on that site. When a group’s access to a resource is revoked, the changes affect all of its members. When a member is removed from a group, their permissions are also removed. This offers some obvious time savings in terms of access management, especially for larger organizations with many users. In addition, a security group can also be turned into a mail-enabled security group and used to send notifications (emails) to all members of that group.
Security Groups vs. Microsoft 365/Office 365 Groups vs. Distribution Lists
Much like any other tool, security groups have their intended purpose. It is the task of the administrators to manage access rights to various resources. However, they are not designed for sending and receiving emails. Another type of group, a mail-enabled security group, has an email address for communication with security group members and allows management of access rights. If you need to create a group just to communicate with a group of users (based on a specific location, from a specific department, etc.), it’s better to use a distribution list. And if you need a group for collaboration between users (with a group email, as well as a shared workspace for conversations, files, calendar events, etc.), a Microsoft 365 group is the best option. If you want to learn more about Microsoft 365 Groups and distribution lists, take a look at this article.
How to create and manage security groups
There are several ways to create a security group in your organization. Below we’ll look at how to do this in the Microsoft 365 admin center and using PowerShell cmdlets.
How to create and manage security groups in the Microsoft 365 admin center
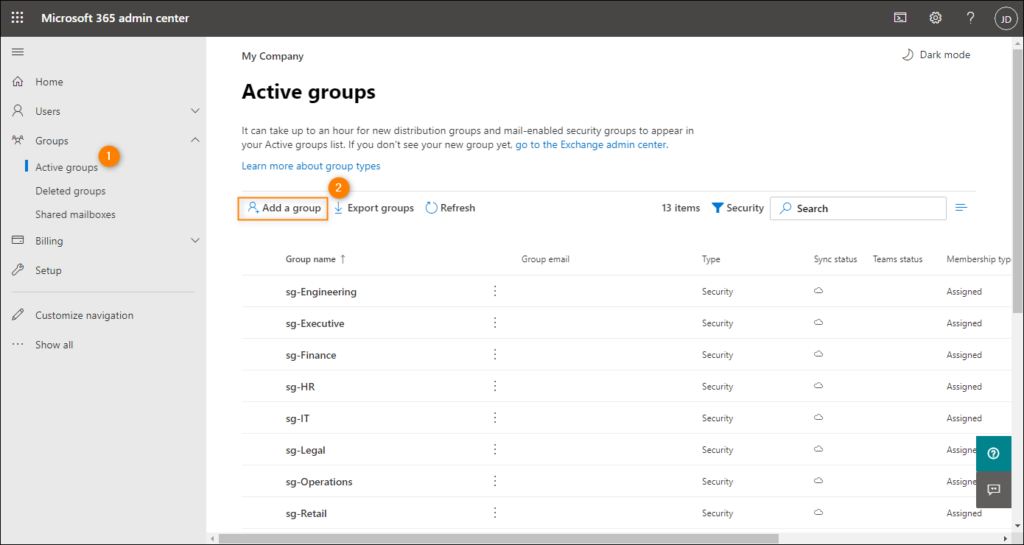
To create a security group in , go to groups > Active Groups and click Add group.
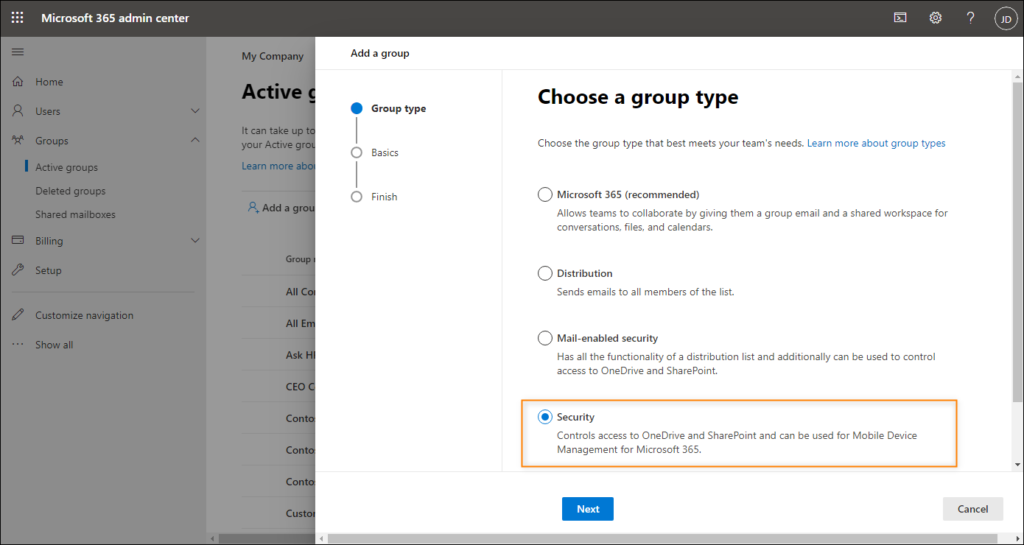
A three-step wizard will open on the right side of the window. In which group type step, select security and click Next keep going.
In which basics Step 1, enter the name of your group (required) and a short description (optional). click Next keep going.

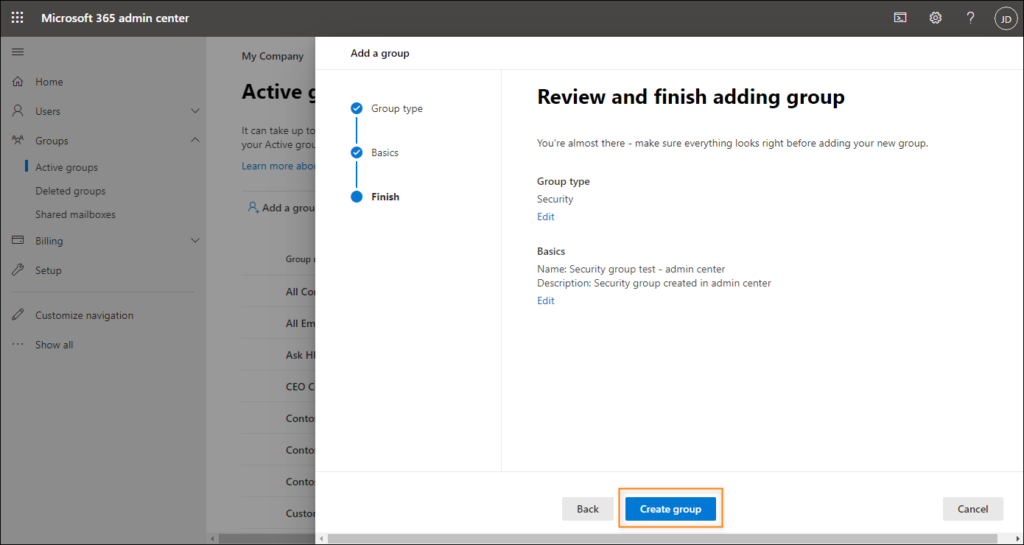
Check the group settings in the End step and click create group.
When your new security group is created, click Conclude back to the Active Groups Side.
Now you can add members to this group. To do this, select the group, go to the members tab and click View all and manage members. In the pane that opens, you can edit the group membership.
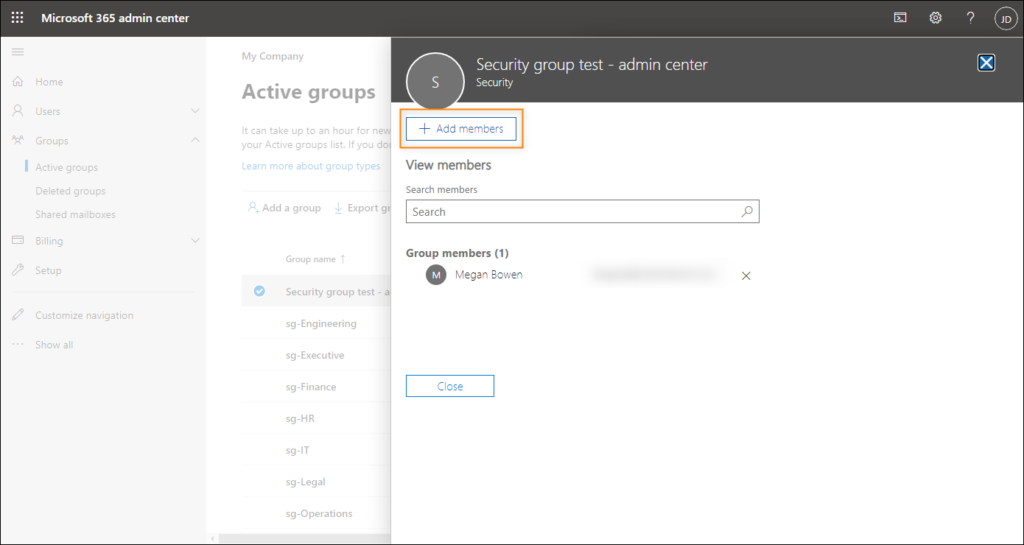
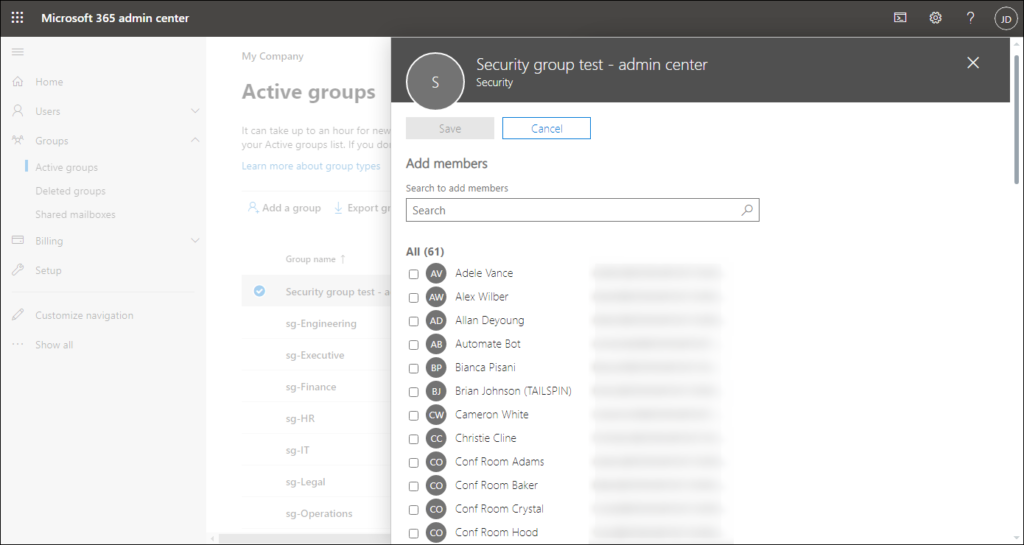
click Add members and select users, groups, or other resources to add to the security group. Use the search box to quickly find specific members. When you’re done, click Save on computer. You can now close this window and return to the window Active Groups Side.
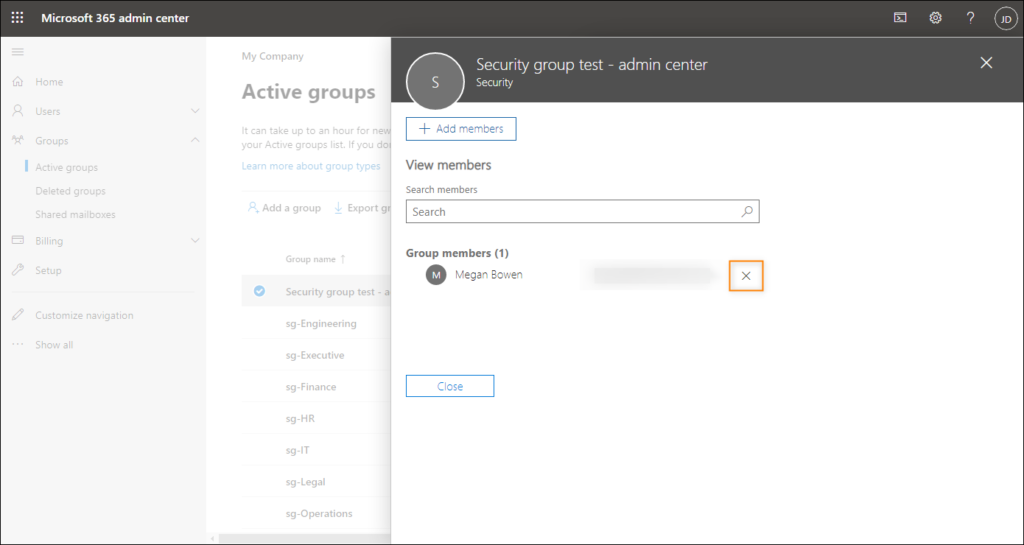
If you want to remove group members, select your security group, go to members tab and click View all and manage members as above. press the X next to the member you want to delete from the group. When you’re done, close the window.
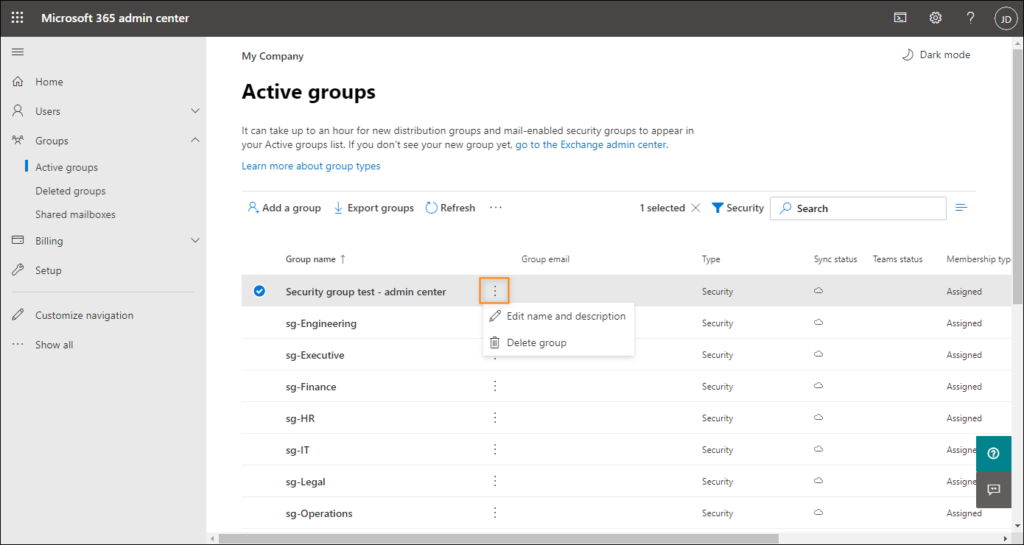
Finally, if you want to delete a security group, you can find it on the Active Groups page, click the More promotions press and select Delete group from the drop-down list.
Instructions for creating and managing security groups using PowerShell cmdlets
It’s possible to use either Exchange Online or Azure Active Directory cmdlets to manage Microsoft 365 security groups. In this article, we will show you how to use the AAD cmdlets. Before you can use them, you must first connect to your Azure Active Directory and sign in using the following cmdlet:
Connect-MsolService
Create a security group
You can now create a security group by running the following cmdlet:
New-MsolGroup -DisplayName "Your security group name" -Description "Security group created in with PowerShell"
Use the -Display name -Parameter to specify the group name and the -Description Parameters (optional) to enter any additional information you need. To confirm that the security group was created, use:
Get-MsolGroup -SearchString "Your security group name"
Through use -Search term “The name of your security group‘, you can only view the newly created group. To view all security groups, use -Group type “security“.
Add members to a security group
The following cmdlet is used to add a member to the group:
Add-MsolGroupMember -groupobjectID <GUID> -groupmembertype User -groupmemberobjectID <GUID>
From where:
- -GroupObjectID is used to identify the group (using GUID),
- -Group member type is the type of group member (user or group)
- -groupmemberobjectID is the GUID of the user.
To add (or remove) members to a security group, you must know the globally unique identifier (GUID) of the group and users you want to add (or remove). You can use the following cmdlets to view a specific user’s identifier:
$(Get-MsolUser -UserPrincipalName "User’s UPN").ObjectID
To view a group’s GUID, use:
Get-MsolGroup -SearchString "Your security group name"
Because you don’t want to manually copy and paste these identifiers, create two separate variables. The first specifies the user’s GUID:
$UserID = (Get-MsolUser -UserPrincipalName "User’s UPN").ObjectID
The second returns the GUID of your security group:
$GroupID = (Get-MsolGroup -SearchString "Your security group name").ObjectID
If you use variables to add a new user, the cmdlet looks like this:
Add-MsolGroupMember -groupobjectID $GroupID -groupmembertype User -groupmemberobjectID $UserID
The biggest benefit of using PowerShell to manage groups is the fact that it’s possible to add many users to a group at once. To do this, first prepare a list of all the users you want to add to a group:
Get-MsolUser -Title "User’s job title"
In this example we use the -Title Parameter that displays a list of all users whose job title field in Active Directory matches the parameter value. Another parameter you might want to use instead is -Departmentwhich lists all users with the specified information in the Department AD field.
We will now use this cmdlet to create a variable containing a list of the GUIDs of all users that meet the defined criteria:
$UserList = (Get-MsolUser -Title "User’s job title").objectID
Next, create a loop that applies each of the objects it contains $userlist to the cmdlet that adds new users to a group:
foreach ($user in $UserList) {Add-MsolGroupMember -groupobjectID $GroupID -groupmembertype User -GroupmemberobjectID $user}
To check if new members have been added to the group, you can view all group members by running:
Get-MsolGroupMember -groupobjectID $GroupID
It is also possible to add another security group as a member of a security group. First create a variable:
$AddedGroupID = (Get-MsolGroup -SearchString "Name of group you want to add").objectID
Then use it in the cmdlet previously used to add members to a group:
Add-MsolGroupMember -groupobjectID $GroupID -groupmembertype Group -groupmemberobjectID $AddedGroupID
Note that the -Group member type has a different value: group.
Remove group members and the security group itself
If you want to remove a user from a security group, prepare variables the same way as adding members and use the following cmdlet (you can also remove multiple members or groups as above):
Remove-MsolGroupMember -groupobjectID $GroupID -groupmembertype User -groupmemberobjectID $UserID
Finally, to remove the security group itself, you need to use the following cmdlet:
Remove-MsolGroup -objectid $GroupID
In addition, you can add the -Force -parameter at the end of the above cmdlet if you don’t want to be prompted to continue with this operation.
See also:
How to export users from Active Directory